The Render of the map was opened in Photoshop and a new layer added. A bright colour was added then a layer mask was used to select the map lines and apply them onto a separate layer. Sections of the reference image were selected and placed onto the map. The transform tool was used to distort the images and make them fit the map.
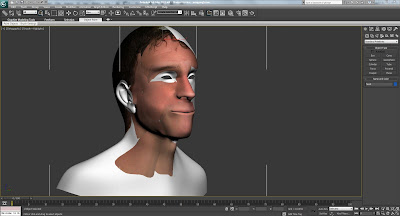
This Photoshop file was then added to a new material in 3ds max and applied to the face.
The parts of the face taken from the reference images were blended together using the clone stamp and the patch tool some of the parts needed the hue & saturation and the brightness & contrast adjusted to match together smoothly.
An action command was set up to save the image and automatically hide the guide layer so that when the Photoshop file is edited and saved 3ds max updates the material and the guide is not shown on the material.
A section of skin was copied from the neck as the ears were not very visible from the reference images. The skin was stretched over the ear map to create the best match of skin colour for them.


No comments:
Post a Comment