To get the hair to look more realistic the hair and fur modifier was used instead of the reference image.
The first step was to clone the head and delete all the polygons except the ones that the hair was going to grow from.

A turbo smooth was applied as well as a symmetry modifier. This gave a surface which the hair and fur modifire could be attached.
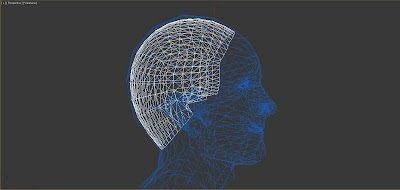


The hair and fur modifier was applied to the surface and using the style hair tool it was brushed to the desired style.

Making sure the "ignore back facing" wasn't selected the hair was brushed form the front and right orthographic views.

By toggling around the viewport it was possible to see which parts of the hair needed brushing.
The original Photoshop file containing the skin had to be modified to remove the image of the hair on the forehead and around the sideburns; this was done with the clone tool and the patch tool.

After the hair had been brushed correctly the cut tool was used to trim the hair around the ear. The hair count was raised to 50000 and the hair segments and hair passes set to 5. The thickness of the roots was adjusted until the hair looked right.
The tip colour and root colour were set to dark brown. To get a shine on the hair the specular tint was set to white and a level of 22. The glossiness was set to 95.

The hair still need some tweaking but its nearly there.

The twist brush was used to try and replicate the way the hair grows from different direction on the back of the scalp.


No comments:
Post a Comment